How to vectorize a logo on Mac
To vectorize a logo on Mac, open the best raster copy in Curvata, compare the automatic trace with the original, check lettering and colors, and export SVG. Use the original vector file instead whenever it is available.
This guide uses Curvata, a free image vectorizer for Mac. Your images are traced locally, with no account or cloud upload.

Find the best version of the logo
A logo is often small on screen but important in print. A thumbnail copied from a social profile may be enough to recognize the mark and still be a poor source for reproducing it. Before tracing, ask whether a designer, brand folder, or original document contains SVG, EPS, PDF, or another vector version.
When only raster artwork is available, choose the clearest source with well-defined edges. A PNG export with a transparent background is useful for flat marks. A high-quality JPEG can work, but inspect its compression noise. Avoid screenshots that include a selection box, cursor, or textured background.
Keep a reference of the intended colors and proportions. Tracing estimates shapes; it does not establish official brand values or give permission to use someone else’s logo. Retain the original image and any brand guidance separately.
Trace and compare the mark
- Open the logo. Use Open image, drag and drop, or ⌘O.
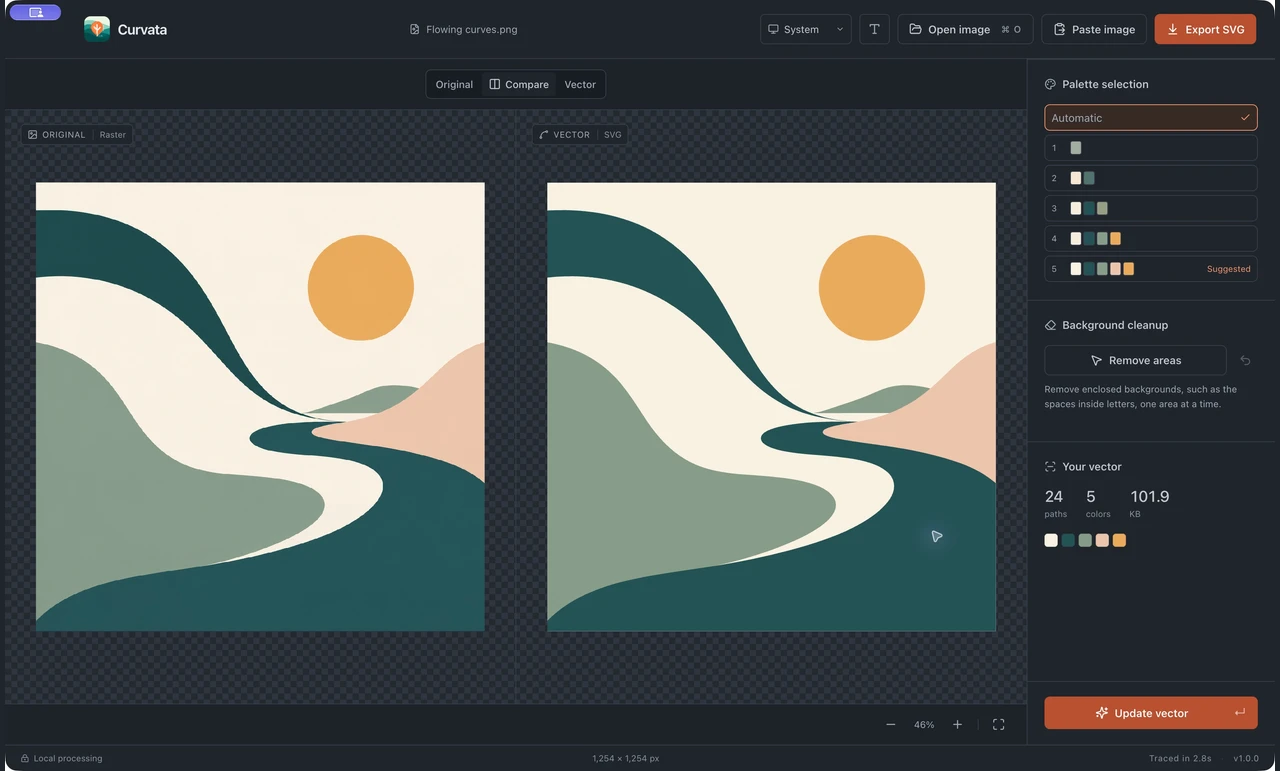
- Start with Automatic. Let Curvata detect the artwork and produce the first trace.
- Compare the silhouette. Look at the overall proportions, distinctive corners, and curves before focusing on tiny details.
- Inspect the lettering. Zoom into counters, narrow spaces, and small type. Check that separate letters have not visually joined.
- Review the color choices. Keep Automatic or choose a quick palette preset and click Update vector.
- Export SVG. Save a new file and open it in your vector editor for final inspection.
For a logo with a colored background, decide whether that background belongs to the identity. Use background area removal only on regions that should be transparent.
Protect lettering and negative space
The empty areas inside letters such as O, A, and P are part of their shape. An incorrect fill or closed gap can make the word look heavier or change the letter entirely. Review both the outer contours and the enclosed regions.
Curvata exports lettering as paths. It does not identify the original font or create live editable text. If a tagline is too small to trace well and you know the correct typeface, setting new text in a vector editor may give a more reliable result than preserving distorted letter shapes.
Also check small symbols, hairline separations, and fine outlines. Automatic vectorization can lose details that occupy very few pixels, particularly when a source is downsampled for processing. A larger original or selective manual correction is appropriate for an exact brand reproduction.
Finish the SVG in a vector editor
The export contains grouped vector regions. Ungroup the outer artwork to select individual elements, and inspect inner fills before deleting or recoloring anything. A background region may sit below the whole mark rather than being attached to a single letter.
Match known brand colors deliberately in the destination editor. A pixel source may already include compression tints or color changes from a screenshot. A traced fill is evidence from that image, not an authoritative brand specification.
View the finished logo at a small size and at a larger size. Check alignment, visible gaps, and the intended background. Keep an untouched SVG export alongside the edited version. The SVG editing guide explains groups and shape-based text in more detail.
Common questions
Is tracing the same as recreating the original logo?
No. It produces an approximation from pixels. Exact reproduction can require a better source, original design files, or manual reconstruction.
Should a logo always use the fewest colors?
No. Use the colors the design needs. A small palette can suit a flat mark but may lose deliberate accents or shading.
Can the exported logo be used for print?
SVG can supply scalable artwork to compatible design software. Check the print provider’s accepted formats, dimensions, color requirements, and final proof before production.
Explore all Curvata guides or visit Curvata for Mac to learn more about the app.