How to remove background areas from an SVG trace
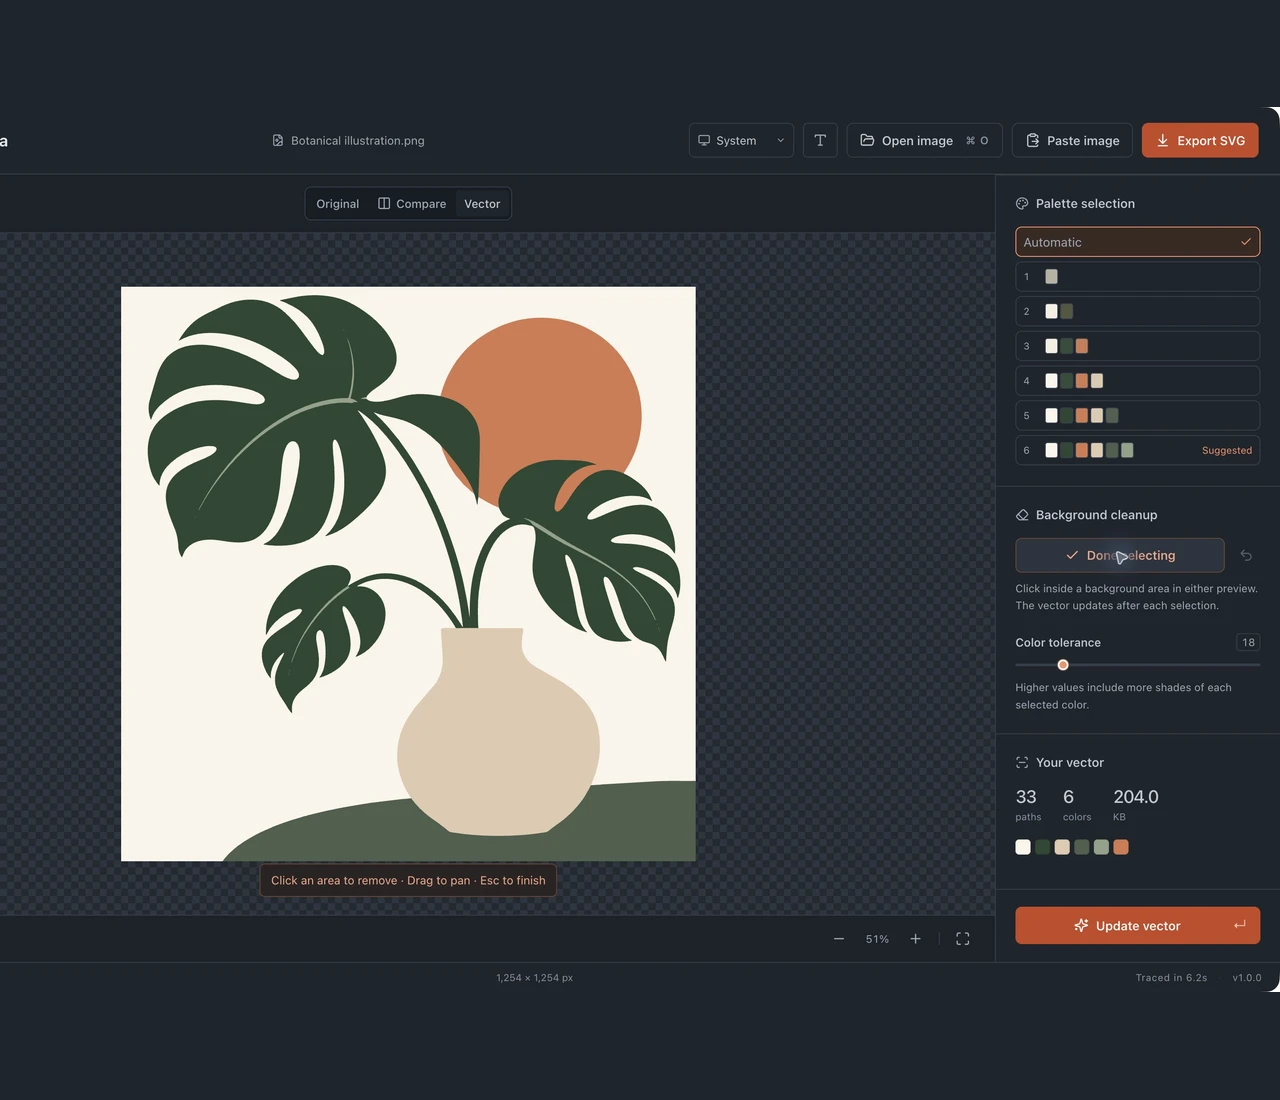
To remove an unwanted background area from a Curvata trace, click Remove areas under Background cleanup, then click inside the region in either preview. The vector updates after each selection. Use Undo or clear the selections if the result removes too much.
This guide uses Curvata, a free image vectorizer for Mac. Your images are traced locally, with no account or cloud upload.

Decide which regions should be transparent
A white region can be a background, a highlight, or an intentional fill inside a letter. Before removing anything, look at the whole design and decide what should remain. For a logo, compare against a reference placed on its intended background.
Source transparency and a painted background are different. A transparent PNG already has empty pixels. A JPEG has no alpha channel, so its plain background is part of the image. A checkerboard painted into a downloaded file is also artwork as far as the tracer is concerned.
Curvata’s current cleanup workflow selects connected color regions. It is useful for solid backgrounds and enclosed spaces, such as a letter counter or paper trapped inside an ink loop. It does not identify a photographic subject using AI segmentation. Hair, textured backgrounds, and soft shadows can require another editing workflow.
Remove a background area step by step
- Open and trace the image. Wait for the initial result before choosing the cleanup tool.
- Click Remove areas. Find it in the right-hand Background cleanup section.
- Select a region. Click inside the unwanted area in the original or vector preview. Curvata samples the selected color and removes that connected region.
- Review the updated SVG. Check the nearby boundary and any enclosed details. Pan by dragging if you need a different view.
- Adjust color tolerance if necessary. A higher value can include more shades of the sampled color. Review again rather than assuming a larger value is better.
- Restore a mistaken selection. Use Undo for the most recent removal, or clear the selections to restore all selected regions.
- Finish and export. Choose Done selecting or press Escape, then click Export SVG.
Selections belong to the current image and reset when another image opens. The area-removal history is not a general edit history for the whole app.
Check enclosed spaces and pale edges
Disconnected regions need separate consideration. The paper outside a letter may be connected across the page, while paper inside its counter is enclosed. Removing one does not necessarily remove the other. Select the intended space and look at what actually changes.
After cleanup, zoom into light halos and narrow strokes. Antialiasing mixes foreground and background colors at an edge, so the boundary can be more complicated than a single flat fill. A tolerance that reaches pale background pixels can also affect a light-colored part of the artwork.
Use the PNG guide for existing alpha transparency, and the JPEG guide for compression noise. Both issues can affect the edge you are trying to keep.
Inspect the exported transparency
Open the SVG in your destination vector editor and view it on more than one background. An unwanted white shape is easiest to notice against a dark or colored surface. Conversely, a missing pale highlight can disappear on white and become obvious on a darker background.
Removed inner areas are transparent cutouts in their shapes. Retained fills can remain grouped with the enclosing object. Inspect those groups before deleting an entire object in your editor. Follow the SVG editing guide for the exported structure.
Background cleanup is a visual change, not a promise that every production tool will interpret the SVG identically. Reopen the final file where it will be used and verify the intended cutouts and fills.
Common questions
Can I remove all white areas at once?
The current visible workflow uses individual connected-area selections. Choose the unwanted regions deliberately so you do not remove white highlights or inner fills that belong to the artwork.
Does Escape restore removed areas?
Escape leaves selection mode. Use the Undo or clear-selection controls to restore areas.
Can I erase a complex photo background?
Color-region selection is not subject segmentation. A complex photographic background may need a dedicated image editor before tracing.
Explore all Curvata guides or visit Curvata for Mac to learn more about the app.